Spring Bean学习
IoC
1 | # IOC概念 |
IoC入门
配置文件
applicationContext.xml
1 |
|
IoC配置(XML格式)
1)bean
名称:bean
类型:标签
归属:beans标签
作用:定义spring中的资源,受此标签定义的资源将受到spring控制
格式:
1
2
3<beans>
<bean />
</beans>基本属性:
1
<bean id="beanId" name="beanName1,beanName2" class="ClassName"></bean>
id:bean的名称,通过id值获取bean
class:bean的类型 (全限定名)
name:bean的名称,可以通过name值获取bean,用于多人配合时给bean起别名
代码演示
配置文件修改
1
2
3<!-- name和id的作用相似, 我们也可以通过name获取bean -->
<bean id="userService" name="userService1,userService2" class="com.itheima.service.impl.UserServiceImpl"/>测试类修改
1
2
3
4
5
6
7
8
9
10
11
12
13
14
15public class UserTest {
public void test01(){
//2.加载配置文件
ApplicationContext ctx = new ClassPathXmlApplicationContext("applicationContext.xml");
//3.获取资源: 通过id和name都能获取到bean
// userService,userService1,userService2都可以
// userService3 因为没有指定,所以会报以下异常:
// NoSuchBeanDefinitionException: No bean named 'userService3' available
UserService userService = (UserService) ctx.getBean("userService3");
userService.save();
}
}
2)bean属性scope
名称:scope
类型:属性
归属:bean标签
作用:定义bean的作用范围
格式:
1
<bean scope="singleton"></bean>
取值:
- singleton:设定创建出的对象保存在spring容器中,是一个单例的对象
- prototype:设定创建出的对象保存在spring容器中,是一个非单例的对象
- request、session、application、 websocket :设定创建出的对象放置在web容器对应的位置 (了解)
代码演示
配置文件修改
1
2
3
4
5
6
7
8
9
10
11
12
13
14
15
16
17<!--
scope : 作用范围
1. singleton : 单例 (默认值)
1). 这个类在容器只会有一个实例
2). 饿汉单例 : 工厂加载配置文件的时候,实例就创建了
效率高
2. prototype : 多例
1). 这个类在容器有多个实例
2). 懒汉多例 : 工厂加载配置文件的时候,没有实例, 获取的时候才创建
3. 运用:
1). 单例: 全工程只要一个实例 (连接池,线程池,工厂...)
2). 多例: 全工程需要多个实例 (连接,线程 ... )
-->
<bean id="userService" class="com.itheima.service.impl.UserServiceImpl"
scope="prototype"
/>测试类修改
1
2
3
4
5
6
7
8
9public class UserServiceImpl implements UserService {
public UserServiceImpl(){
System.out.println("constructor run...");
}
public void save() {
System.out.println("UserServiceImpl run...");
}
}
1 |
|
3)bean生命周期
名称:init-method,destroy-method
类型:属性
归属:bean标签
作用:定义bean对象在初始化或销毁时完成的工作
格式:
1
<bean init-method="init" destroy-method="destroy"></bean>
取值:bean对应的类中对应的具体方法名
注意事项:
当scope=“singleton”时,spring容器中有且仅有一个对象,init方法在创建容器时仅执行一次
当scope=“prototype”时,spring容器要创建同一类型的多个对象,init方法在每个对象创建时均执行一次
当scope=“singleton”时,关闭容器会导致bean实例的销毁,调用destroy方法一次
当scope=“prototype”时,对象的销毁由垃圾回收机制gc()控制,destroy方法将不会被执行
代码演示
实现类修改
1
2
3
4
5
6
7
8
9
10
11
12
13
14
15
16
17public class UserServiceImpl implements UserService {
public UserServiceImpl(){
System.out.println("UserServiceImpl constructor..");
}
public void save() {
System.out.println("userService save--");
}
public void a(){
System.out.println("init");
}
public void destroy(){
System.out.println("destroy");
}
}
配置文件
1
2
3
4
5
6
7
8
9
10
11
12
13
14
15
16
17
18
19
20
21
22
23
24
25
26
27
28
29
30
31
32
33
34
35
36<!--
bean的生命周期方法
0. 概念
生命周期: 从创建到销毁的整个过程
bean的生命周期方法 : 在一个bean从创建到销毁的整个过程中执行的方法
1. init-method : 用来指定bean的init方法(初始化)
执行时机: 此方法bean创建的时候调用
适合 : 初始化数据
2. destroy-method : 用来指定bean的destroy方法(销毁)
此方法bean销毁的时候调用
适合 : 保存数据,释放资源
底层原理:
Class clazz = Class.forName("com.itheima.service.impl.UserServiceImpl");
Object obj = clazz.newInstance(); // 通过空参构造创建实例
//在类中,找到名为a的public空参方法
Method method = clazz.getMethod("a");
//调用方法
method.invoke(obj);
饿汉单例:
1. 初始化: 工厂创建,bean就会被加载, bean的init方法就会执行
2. 销毁 : 程序终止, 工厂(ioc容器)销毁,bean也会随之销毁,destroy方法就会执行
懒汉多例 :
1. 初始化 : 每从ioc容器中获取一个bean,就会创建一个bean,init方法就会被调用一次
2. 销毁 : bean对象不由ioc容器管理, ioc容器销毁, bean不会随之销毁的,destroy不执行
由GC管理(垃圾回收器)
-->
<bean id="userService"
scope="prototype"
class="com.itheima.service.impl.UserServiceImpl"
init-method="a"
destroy-method="destroy"
/>测试类修改
1
2
3
4
5
6
7
8
9
10
11
12
13
14
15
16
public void method03(){
//1. 创建工厂对象
ApplicationContext context = new ClassPathXmlApplicationContext("applicationContext.xml");
//2. 从ioc容器中获取bean
UserService userService = (UserService) context.getBean("userService");
UserService userService2 = (UserService) context.getBean("userService");
/*
工厂销毁(当程序运行结束时, 工厂就会销毁)
1. 如果程序正常运行终止, 工厂是会销毁的,但是因为demo的运行太快, destroy有执行
但是时间太短, 看不到destroy,所以现在手动调用close方法(这个代码没必要写)
2. close方法是属于 ClassPathXmlApplicationContext特有的,ApplicationContext没有
*/
ClassPathXmlApplicationContext ctx = (ClassPathXmlApplicationContext) context;
ctx.close();
}
4)bean对象创建方式
1 | # bean对象的创建方式 |
除了以上所示的通过调用bean的构造方法创建对象之外,spring还提供了两种工厂创建方式
一般用来配置其他框架的bean
(1)静态工厂
名称:factory-bean
类型:属性
归属:bean标签
作用:定义bean对象创建方式,使用静态工厂的形式创建bean,兼容早期遗留系统的升级工作
格式:
1
<bean class="FactoryClassName" factory-method="factoryMethodName"></bean>
取值:工厂bean中用于获取对象的静态方法名
注意事项:
class属性必须配置成静态工厂的类名
测试代码:
新增一个静态工厂类
1
2
3
4
5
6
7
8
9
10
11
12
13
14
15
16
17package com.itheima.service.impl;
import com.itheima.service.UserService;
public class UserServiceImpl2 implements UserService {
int a;
public UserServiceImpl2(int a){
this.a = a;
}
public void save() {
System.out.println("user service2 running...");
}
}
1 | package com.itheima.factory; |
配置文件修改
1
2
3
4
5
6
7
8
9
10
11
12
13<!--
如果一个类没有空参构造,就不能用 bean:id,class方法配置
1. 静态工厂
2. 实例工厂
# 静态工厂的原理
clazz = Class.forName("com.itheima.factory.StaticFactory");
getBean = clazz.getMethod("getBean");
UserService service = getBean.invoke(null);
map.put("userService2",service);
-->
<bean id="userService2" class="com.itheima.factory.StaticFactory"
factory-method="getBean"/>测试类修改
1
2
3
4
5
6
7
8
9
public void test04(){
ApplicationContext ctx
= new ClassPathXmlApplicationContext("applicationContext.xml");
UserService service = (UserService) ctx.getBean("userService2");
service.save();
}打印结果:
user service2 running…
(2)实例工厂
名称:factory-bean,factory-method
类型:属性
归属:bean标签
作用:定义bean对象创建方式,使用实例工厂的形式创建bean,兼容早期遗留系统的升级工作
格式:
1
<bean factory-bean="factoryBeanId" factory-method="factoryMethodName"></bean>
取值:工厂bean中用于获取对象的实例方法名
注意事项:
- 使用实例工厂创建bean首先需要将实例工厂配置bean,交由spring进行管理
- factory-bean是实例工厂的beanId
测试代码
创建实例工厂
1
2
3
4
5
6
7
8
9
10
11
12
13
14
15package com.itheima.factory;
import com.itheima.service.UserService;
import com.itheima.service.impl.UserServiceImpl2;
/*
* 实例工厂: 方法是非静态
* */
public class InstanceFactory {
public UserService getBean(){
UserServiceImpl2 service = new UserServiceImpl2(1);
return service;
}
}配置文件修改
1 | <!-- |
测试类修改
1
2
3
4
5
6
7
8
9
public void test04(){
ApplicationContext ctx
= new ClassPathXmlApplicationContext("applicationContext.xml");
UserService service = (UserService) ctx.getBean("userService3");
service.save();
}运行结果
user service2 running…
5)DI 依赖注入
张三(男)和李四(女)结婚
- 张三的亲友: 张三娶了李四
- 李四的亲友: 李四嫁给了张三
IoC(Inversion Of Control)控制翻转,Spring反向控制应用程序所需要使用的外部资源
DI(Dependency Injection)依赖注入,应用程序运行依赖的资源由Spring为其提供,资源进入应用程序的方式称为注入
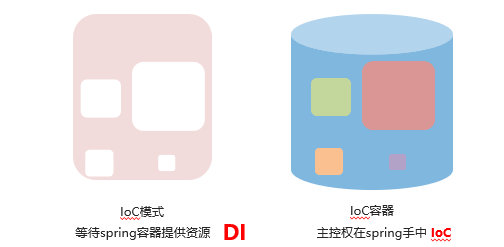
IoC与DI是同一件事站在不同角度看待问题
4.6)set注入(主流)
名称:property
类型:标签
归属:bean标签
作用:使用set方法的形式为bean提供资源
格式:
1
2
3<bean>
<property />
</bean>基本属性:
1
<property name="propertyName" value="propertyValue" ref="beanId"/>
name:对应bean中的属性名,要求该属性必须提供可访问的set方法(严格规范为此名称是set方法对应名称)
value:设定非引用类型(8大基本类型和String)属性对应的值,不能与ref同时使用
ref:设定引用类型属性对应bean的id ,不能与value同时使用
注意:一个bean可以有多个property标签
代码演示
添加和修改代码
1
2
3
4
5
6
7
8
9
10
11
12
13
14
15
16
17
18
19
20
21
22
23
24
25
26
27
28
29
30
31
32
33
34
35
36
37
38
39
40
41
42
43
44
45
46
47
48
49
50
51
52
53package com.itheima.service.impl;
import com.itheima.dao.UserDao;
import com.itheima.service.UserService;
import java.util.Date;
public class UserServiceImpl3 implements UserService {
private String name;
private int age;
private UserDao dao;
private Date date;
public void save() {
System.out.println(name + "," + age + "," + date);
dao.add();
}
public Date getDate() {
return date;
}
public void setDate(Date date) {
this.date = date;
}
public String getName() {
return name;
}
public void setName(String name) {
this.name = name;
}
public int getAge() {
return age;
}
public void setAge(int age) {
this.age = age;
}
public UserDao getDao() {
return dao;
}
public void setDao(UserDao dao) {
this.dao = dao;
}
}1
2
3
4public interface UserDao {
void add();
}1
2
3
4
5
6
7
8
9
10
11package com.itheima.dao.impl;
import com.itheima.dao.UserDao;
public class UserDaoImpl implements UserDao {
public void add() {
System.out.println("UserDaoImpl add...");
}
}修改配置文件
1
2
3
4
5
6
7
8
9
10
11
12
13
14
15
16
17
18
19
20
21
22
23<!--
set注入
1. 原理 : 空参构造 + set方法
clazz = Class.forName("com.itheima.service.impl.UserServiceImpl3");
service = class.newInstance(); //
setName = clazz.getMethod("setName")
setName.invoke(service,"zs");
// service.setName("zs");
2. 配置 : bean标签内子标签property
1). name : bean中的属性名
2). 值
value : 写基本类型和字符串
ref: 引用类型
-->
<bean id="userDao" class="com.itheima.dao.impl.UserDaoImpl"/>
<bean id="myDate" class="java.util.Date"/>
<bean id="userService33" class="com.itheima.service.impl.UserServiceImpl3">
<property name="name" value="zs"/>
<property name="age" value="18"/>
<property name="dao" ref="userDao"/>
<property name="date" ref="myDate"/>
</bean>修改测试类
1
2
3
4
5
6
7
8
9
public void test05(){
ApplicationContext ctx
= new ClassPathXmlApplicationContext("applicationContext.xml");
UserService service = (UserService) ctx.getBean("userService33");
//zs,18,Tue Aug 10 15:32:32 CST 2021
//UserDaoImpl add...
service.save();
}
运行结果
zs,18,Tue Aug 10 15:32:32 CST 2021
UserDaoImpl add…
4.7)构造器注入(了解)
名称:constructor-arg
类型:标签
归属:bean标签
作用:使用构造方法的形式为bean提供资源,兼容早期遗留系统的升级工作
格式:
1
2
3<bean>
<constructor-arg />
</bean>基本属性:
1
<constructor-arg name="argsName" value="argsValue />
name:对应bean中的构造方法所携带的参数名
value:设定非引用类型构造方法参数对应的值,不能与ref同时使用
其他属性:
1 | <constructor-arg index="arg-index" type="arg-type" ref="beanId"/> |
ref:设定引用类型构造方法参数对应bean的id ,不能与value同时使用
type :设定构造方法参数的类型,用于按类型匹配参数或进行类型校验
index :设定构造方法参数的位置,用于按位置匹配参数,参数index值从0开始计数
注意:一个bean可以有多个constructor-arg标签
代码演示
修改代码
1
2
3
4
5
6
7
8
9
10
11
12
13
14
15
16
17
18
19
20
21
22
23
24
25
26
27
28package com.itheima.service.impl;
import com.itheima.dao.UserDao;
import com.itheima.service.UserService;
import java.util.Date;
public class UserServiceImpl4 implements UserService {
private String name;
private int age;
private UserDao dao;
private Date date;
public UserServiceImpl4(String name, int age, UserDao dao, Date date) {
this.name = name;
this.age = age;
this.dao = dao;
this.date = date;
}
public void save() {
System.out.println(name + "," + age + "," + date);
dao.add();
}
}修改配置文件
1
2
3
4
5
6
7
8
9
10
11
12
13
14
15
16
17
18<!--
构造器注入 (了解)
1. 原理
clazz = Class.forName("com.itheima.service.impl.UserServiceImpl3");
contructor = clazz.getConstructor(String.class,int.class,UserDao.class,Date.class);
service = contructor.newInstance("zs",18,userDao,myDate);
map.put("userService44",service);
2. 配置
-->
<bean id="userDao" class="com.itheima.dao.impl.UserDaoImpl"/>
<bean id="myDate" class="java.util.Date"/>
<bean id="userService44" class="com.itheima.service.impl.UserServiceImpl4">
<constructor-arg name="name" value="zs"/>
<constructor-arg name="age" value="18"/>
<constructor-arg name="dao" ref="userDao"/>
<constructor-arg name="date" ref="myDate"/>
</bean>修改测试类
1
2
3
4
5
6
7
8
9
public void test05(){
ApplicationContext ctx
= new ClassPathXmlApplicationContext("applicationContext.xml");
UserService service = (UserService) ctx.getBean("userService44");
//zs,18,Tue Aug 10 15:32:32 CST 2021
//UserDaoImpl add...
service.save();
}
运行结果
zs,18,Tue Aug 10 15:35:31 CST 2021
UserDaoImpl add…
4.8)集合类型数据注入(了解)
名称:array,list,set,map,props
类型:标签
归属:property标签 或 constructor-arg标签
作用:注入集合数据类型属性
格式:
1
2
3<property>
<list></list>
</property>
(1)集合类型数据注入——list(掌握)
1 | <property name="al"> |
(2)集合类型数据注入——props(掌握)
1 | <property name="properties"> |
(3)集合类型数据注入——array (了解)
1 | <property name="arr"> |
(4)集合类型数据注入——set(了解)
1 | <property name="hs"> |
(5)集合类型数据注入——map(了解)
1 | <property name="hm"> |
代码演示
修改代码
1
2
3
4
5
6
7
8
9
10
11
12
13
14
15
16
17
18
19
20
21
22
23
24
25
26
27
28
29
30
31
32
33
34
35
36
37
38
39
40
41
42
43
44
45
46
47
48
49
50
51
52
53
54
55
56
57
58
59
60
61
62
63
64
65
66
67
68
69package com.itheima.service.impl;
import com.itheima.service.UserService;
import java.util.*;
public class UserServiceImpl5 implements UserService {
//前两个是重点
private List<String> list;
private Properties p;
//了解
private int[] array;
private Set<String> set;
private Map<String,String> map;
public void save() {
System.out.println("UserServiceImpl5 save...");
System.out.println("list->" + list);
System.out.println(list instanceof ArrayList);//true
System.out.println("properties->" + p);
System.out.println("array->" + Arrays.toString(array));
System.out.println("set->" + set);
System.out.println("map->" + map);
}
public List<String> getList() {
return list;
}
public void setList(List<String> list) {
this.list = list;
}
public Properties getP() {
return p;
}
public void setP(Properties p) {
this.p = p;
}
public int[] getArray() {
return array;
}
public void setArray(int[] array) {
this.array = array;
}
public Set<String> getSet() {
return set;
}
public void setSet(Set<String> set) {
this.set = set;
}
public Map<String, String> getMap() {
return map;
}
public void setMap(Map<String, String> map) {
this.map = map;
}
}修改配置文件
1
2
3
4
5
6
7
8
9
10
11
12
13
14
15
16
17
18
19
20
21
22
23
24
25
26
27
28
29
30
31
32
33
34
35
36
37
38
39
40
41
42
43
44
45
46
47
48
49
50
51
52
53
54
55
56
57<!--
# 集合类型数据注入
1. properties标签的name属性指定的是UserServiceImpl5中对应的属性名
2. properties的子标签
1). list : 声明该属性是List类型
2). props : 声明该属性是Properties类型
3). array : 声明该属性是数组类型
4). set : 声明该属性是Set类型
5). map : 声明该属性是Map类型
原理:
clazz = Class.forName("com.itheima.service.impl.UserServiceImpl5")
service = clazz.newInstance();
setList = service.getMethod("setList",List.class);
List list = new ArrayList();
list.add("zs");
list.add("ls");
list.add("ww");
setList.invoke(service,list);// service.setList(list)
-->
<bean id="userServiceImpl5" class="com.itheima.service.impl.UserServiceImpl5">
<property name="list">
<list>
<value>zs</value>
<value>ls</value>
<value>ww</value>
</list>
</property>
<property name="p">
<props>
<prop key="username">admin</prop>
<prop key="password">123</prop>
</props>
</property>
<property name="array">
<array>
<value>100</value>
<value>200</value>
</array>
</property>
<property name="set">
<set>
<value>ml</value>
<value>qq</value>
</set>
</property>
<property name="map">
<map>
<entry key="name" value="zhangsan"/>
<entry key="age" value="18"/>
</map>
</property>
</bean>修改测试类
1
2
3
4
5
6
7
public void test06(){
ApplicationContext ctx
= new ClassPathXmlApplicationContext("applicationContext.xml");
UserService service = (UserService) ctx.getBean("userServiceImpl5");
service.save();
}
运行结果
UserServiceImpl5 save…
list->[zs, ls, ww]
true
properties->{password=123, username=admin}
array->[100, 200]
set->[ml, qq]
map->{name=zhangsan, age=18}
4.9)SpEL
el : expression language 表达式语言
总体含义: 都是数据引用
JSP: el表达式
mybatis : el表达式
#{} / ${}
spring : el表达式
#{} / ${}
js : el表达式
一共${money}元
Spring提供了对EL表达式的支持,统一属性注入格
类型:属性值
归属:value属性值
作用:为bean注入属性值
格式:
1
<property value="EL"></bean>
1
2
3
4
5# springEL表达式
1. ${}
${} 用于加载外部文件指定的Key值 (在下一节课的properties文件中演示)
2. #{}
#{} 强调的是把内容赋值给属性注意:所有属性值不区分是否引用类型,统一使用value赋值
所有格式统一使用 value=“********”
常量 #{10} #{3.14} #{2e5} #{‘itcast’}
引用bean #{beanId}
引用bean属性 #{beanId.propertyName}
引用bean方法 beanId.methodName().method2()
引用静态方法 T(java.lang.Math).PI
运算符支持 #{3 lt 4 == 4 ge 3}
正则表达式支持 #{user.name matches‘[a-z]{6,}’}
集合支持 #{likes[3]}
代码演示:
修改核心配置文件
1
2
3
4
5
6
7
8
9
10
11
12
13
14
15
16
17
18
19
20
21
22
23
24
25
26<!--
value属性: 指定基本类型数据 (8大基本类型+String)
ref属性: 指定的引用类型
springEL
1. ${表达式}
引入配置文件中的数据
2. #{表达式}
强调的是把内容赋值给属性
#{'字符串'}
#{数字,boolean}
#{变量名}
-->
<bean id="myDate" class="java.util.Date"/>
<bean id="userDao" class="com.itheima.dao.impl.UserDaoImpl"/>
<bean id="userService" class="com.itheima.service.impl.UserServiceImpl2">
<!-- <property name="name" value="zs"/>
<property name="age" value="18"/>
<property name="date" ref="myDate"/>
<property name="dao" ref="userDao"/>-->
<property name="name" value="#{'ls'}"/>
<property name="age" value="#{18}"/>
<property name="date" value="#{myDate}"/>
<property name="dao" value="#{userDao}"/>
</bean>
4.10)properties文件
Spring提供了读取外部properties文件的机制,使用读取到的数据为bean的属性赋值
操作步骤
1.准备外部properties文件
2.开启context命名空间支持
1
xmlns:context="http://www.springframework.org/schema/context"
3.加载指定的properties文件
1 | <context:property-placeholder location="classpath:filename.properties"/> |
4.使用加载的数据
1 | <property name="propertyName" value="${propertiesName}"/> |
注意:如果需要加载所有的properties文件,可以使用
*.properties表示加载所有的properties文件注意:读取数据使用**${propertiesName}格式进行,其中propertiesName**指properties文件中的属性名
测试代码:
新增一个配置文件

1
2
3
4
5
6
7
8
9
10
11
12
13
14
15
16
17
18
19
20
21
22
23
24
25
26
27
28public class UserServiceImpl implements UserService {
//1. 声明需要注入的资源,并声明对应的set方法
String name;
int age;
UserDao userDao;
public void setName(String name) {
this.name = name;
}
public void setAge(int age) {
this.age = age;
}
public void setUserDao(UserDao userDao) {
this.userDao = userDao;
}
public void save() {
System.out.println("UserServiceImpl run:" + name + "," + age);
userDao.find();
}
}配置文件修改
1
2
3
4
5
6
7
8
9
10
11
12
13
14
15
16
17
18
19
20
21
22
23
24
25
26
27
28
29
30
31
32
<!--
1. schema约束新增: 开启context命名空间支持
xmlns:context="http://www.springframework.org/schema/context"
xsi:schemaLocation="http://www.springframework.org/schema/beans
https://www.springframework.org/schema/beans/spring-beans.xsd
http://www.springframework.org/schema/context
https://www.springframework.org/schema/context/spring-context.xsd"
-->
<beans xmlns="http://www.springframework.org/schema/beans"
xmlns:xsi="http://www.w3.org/2001/XMLSchema-instance"
xmlns:context="http://www.springframework.org/schema/context"
xsi:schemaLocation="http://www.springframework.org/schema/beans
https://www.springframework.org/schema/beans/spring-beans.xsd
http://www.springframework.org/schema/context
https://www.springframework.org/schema/context/spring-context.xsd
">
<!--2. 加载指定的properties文件-->
<context:property-placeholder location="classpath:data.properties"/>
<bean id="userDao" class="com.itheima.ioc.dao.impl.UserDaoImpl"/>
<!--
3. 使用加载的数据
${外部文件中的key}
-->
<bean id="userService" class="com.itheima.ioc.service.impl.UserServiceImpl">
<property name="userDao" ref="userDao"/>
<property name="name" value="${name}"/>
<property name="age" value="${age}"/>
</bean>
</beans>测试类修改
1
2
3
4
5
6
7
8
9
10
11public class UserTest {
public void test01(){
//2.加载配置文件
ApplicationContext ctx = new ClassPathXmlApplicationContext("applicationContext.xml");
//3.获取资源: 通过配置文件中的id
UserService userService = (UserService) ctx.getBean("userService");
userService.save();
}
}打印结果:
UserServiceImpl run:zs,20
UserDao find…
